

Raytracer
| Genre | Description | Technologies | Development Status |
|---|---|---|---|
| Demo (sort of) | The ray-tracer project traditional in Computer Graphics 2 | C++, Eigen, SDL, CMake | finished |
This is the only school project you’ll find here, and for good reason: I really like the pretty pictures! While I and a partner developed this, we had to maintain a web page as part of the assignment; since that was already done, I didn’t even have the excuse of laziness not to show it off. The assignment was broken up into seven milestones, shown below, and you can see the images go from awful to…well, you decide.
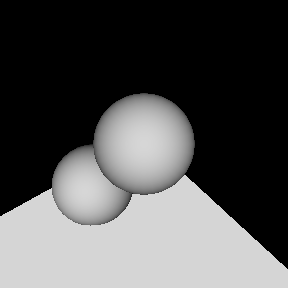
Here is milestone 1. It messily uses GL along with bits and pieces of former projects to recreate the Turner Whitted image, albeit with terrible lighting. Since the GL part will be thrown out the window going forward, I put more effort into carving out a solid framework to code in, and bringing in Eigen so I get vectors without having to reinvent the mathematical wheel.
Here’s a screencap:
The parameters of object locations are defined as follows:
    glutInitWindowSize( 288, 288 );
    // Observer on Z axis, looking at origin, up is Y axis
    gluLookAt( 0.0, 0.0, 2.0, 0.0, 0.0, 0.0, 0.0, 1.0, 0.0 );
    /* Light from z-axis */
    GLfloat light1_position[4] = { 0.0, 0.0, 1.0, 0.0 };
    glColor3f(1.0, 1.0, 1.0);
    glBegin( GL_QUADS );
        glVertex3f(-1.5, -0.2, -20.0);
        glVertex3f(0.9, -0.2, -20.0);
        glVertex3f(0.9, -0.8, 1.0);
        glVertex3f(-1.5, -0.8, 1.0);
    glEnd();
    glTranslatef(-0.5, -0.4, -0.5);
    glutSolidSphere(0.4, 32, 32);
    glutSolidSphere(0.4, 32, 32);
Milestone 2 was a bit different. Between ripping out the GL portion of the existing project and patching up the rest of it as neatly as possible, and shooting files back and forth over break owing to no source control, the intersection calculations were somewhat of an afterthought and still quite messy. Supersampling was easy enough, though–it basically amounted to tracing an image of twice the dimensions and averaging each 4 adjacent pixels, although curiously the jaggies on the right are still mostly distinguishable. And the screencaps:

Milestone 3 was fraught with flu, but between a couple of nasty bugs that were easily noticed once I turned -Wall back on (who knew functions with a return value needed a return statement?) and a typo or two, jamming shading into the algorithm was surprisingly straightforward. Adding another light to the scene was trivial. Oh, and I even threw in a better background!
And the screencaps (two lights appears on the right):
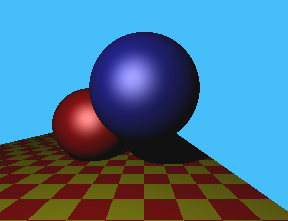
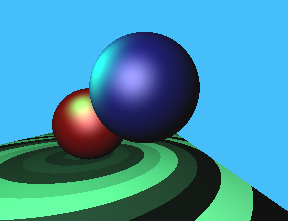
Milestone 4 went pretty smoothly. The task of adding in procedural checkering was small enough in scope that it left room for some bugfixes, refactoring, and such. I tweaked some image placement parameters. My partner threw in an alternate shade pattern made up of concentric circles with colors governed by perlin noise. I think it looks like a carpet. Oh, and it looks even goofier with the second light thrown in.
Here are the screencaps (“carpet” image on the right):
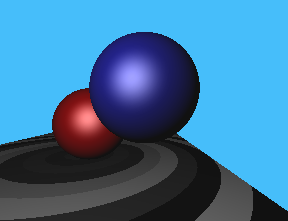
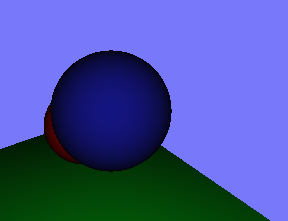
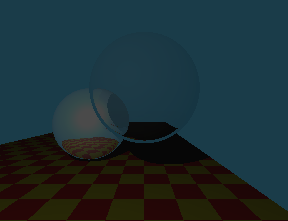
Ugh. Brick wall after brick wall is no fun. First was the fuzzy static in the image that baffled us completely until it was explained to be a telltale sign of intersecting the same point twice due to floating point imprecision. Then came some really psychedelic reflections that would have been great if they weren’t, y’know, wrong. Evidently the reflection formula is somehow different depending on whether it’s being used for specular lighting or ray recursion. I’m guessing there’s a negative sign missing somewhere in the mix, but for now I’m finished.
Here’s all I get for my pain and suffering:
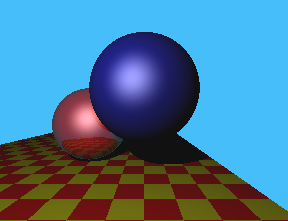
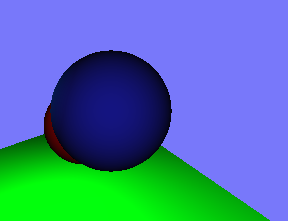
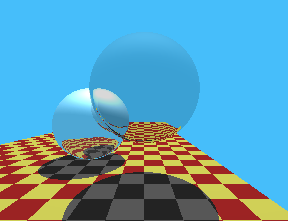
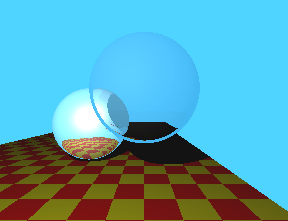
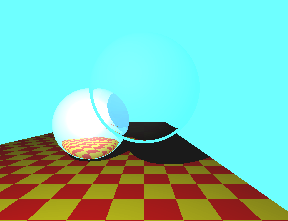
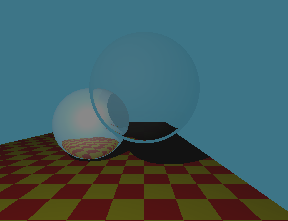
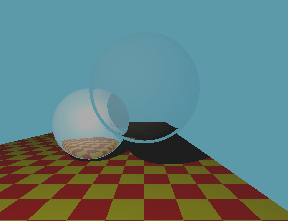
Implementing refraction was a bit more straightforward. No brick walls to speak of, at least. My partner Brian did most of the heavy lifting for this one, while I offered guidance. Our sphere intersection routine needed to be tweaked, and it took a couple of attempts to nail the refracted ray formula. I did some more parameter tweaking to get our image to jive with Whitted’s image, and I’ve arrived at the conclusion that it’s not going to happen without ‘cheating.’ Why? Because he cheated in the first place! For example, the shadow in the original is smaller than the sphere casting it, and the other sphere isn’t casting any shadow at all. So instead I’ll take the higher moral ground of a true-blue ray-traced image. Yep. Totally.
As always, here’s the result:
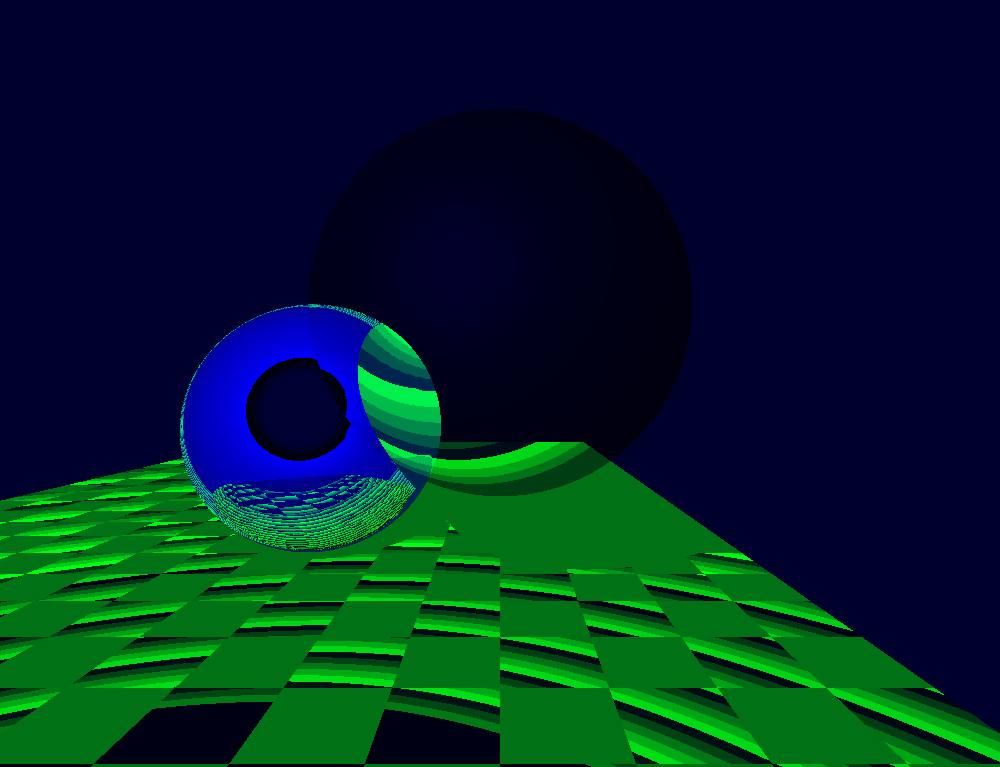
Tone reproduction was confusing, but no more complicated than translating the algorithms word for word into C++. Unfortunately, upon placing the images up, I realized that several graphical improvements, i.e. shadows, were lost in the bowels of shoddy source control, and hope to fix that within the next six hours. D’oh!
Here are our results for Ward reproduction:
Reinhard results follow, with modified Reinhard key-value images coming last:


Download
Here’s a tarball of milestone 1 as of 12/9:
And milestone 2 as of 1/4(/10)
And milestone 3 as of 1/15(/10)
And milestone 4 as of 1/15(/10)
And milestone 5 as of 1/15(/10)
And milestone 6 as of 2/13(/10)
And milestone 7 as of 2/22(/10)
That’s all, folks!